


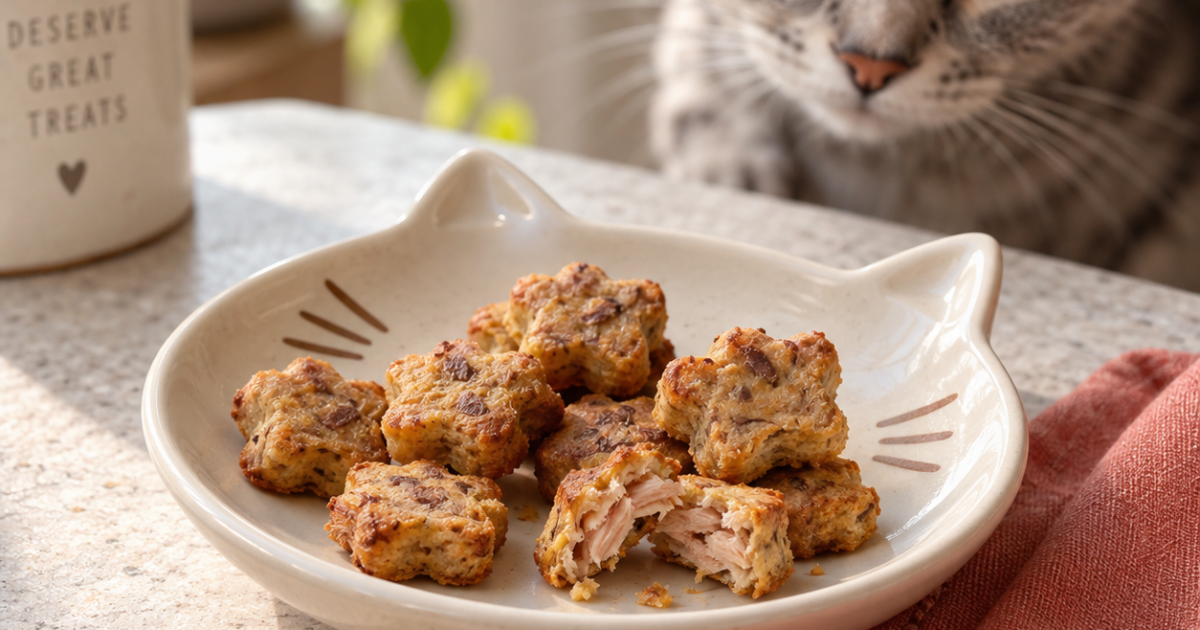
Quick answer: You can make three-ingredient tuna cat treats with no-salt-added tuna in water, one egg, and oat flour. Blend, shape very small pieces, bake until set, cool completely, and serve only as an occasional treat.
The appeal of this recipe is not that three ingredients are automatically healthier. It is that a short list makes the treat easier to understand, portion, and adjust. Tuna supplies the aroma most cats notice first, egg binds the mixture, and oat flour turns it into dough that can be shaped without added salt or sugar.
Use this recipe when you want a tiny training reward or an occasional food topper—not a meal. Canned tuna varies widely in sodium and oil, so the label matters more than the front-of-can wording. Choose tuna packed in water with no added salt whenever available, drain it well, and avoid seasoned pouches.
Why this version is practical
- The tuna is aromatic enough that the pieces can stay very small.
- The dough can be rolled thin for crisp treats or left slightly thicker for a softer center.
- Every ingredient has a clear job; there is no sugar, salt, oil, cheese, or decorative topping.
- The small batch is easier to finish safely within a short refrigerated storage window.
Ingredient decisions that matter
Tuna: “In water” does not always mean low sodium. Compare labels and drain the fish. This is an occasional flavor, not a reason to feed tuna every day.
Oat flour: Its role is structural. Add only enough to shape the dough; too much creates dense treats and unnecessary calories. You can make it by finely grinding plain rolled oats.
Egg: Use a fully cooked final product. Raw egg is not an appropriate shortcut for a soft treat.
Three-Ingredient Tuna Cat Treats
Tiny baked tuna treats made with a drained fish base, egg binder, and enough oat flour to create a workable dough.
- Prep
- 10 minutes
- Cook
- 12–16 minutes
- Total
- 40 minutes including cooling
- Yield
- About 24 pea-size treats
- Storage
- Refrigerate 3–4 days
Equipment
- Mixing bowl
- Fork or food processor
- Parchment-lined baking sheet
- Measuring cups and spoons
- Food thermometer when starting with raw animal protein
Ingredients
- 1 can (5 oz / 142 g) no-salt-added tuna in water (drained very well)
- 1 large egg (beaten)
- 1/2 cup (about 50 g) plain oat flour (plus 1 tablespoon only if needed)
Instructions
- Prepare: Heat the oven to 325°F (163°C). Line a baking sheet with parchment. Break the drained tuna into very fine flakes and check carefully for hard fragments.
- Mix: Combine tuna and beaten egg. Stir in the oat flour gradually until the mixture holds together as a soft, slightly tacky dough. Do not keep adding flour simply to make it dry.
- Shape: Roll or pat the dough to about 1/4 inch thick between two sheets of parchment. Cut pea-size squares, or pinch off equally small pieces so the final portions remain controllable.
- Bake: Bake for 12 to 16 minutes, rotating the pan once. The pieces should be set with lightly dry edges, not dark brown or rock hard.
- Cool: Cool completely on the tray. Count the finished pieces before storage so you can calculate the calories per treat from the ingredient labels.
What “done” should look and feel like
A finished piece should lift cleanly from the parchment and break with light pressure after cooling. If the center smears like raw dough, return the batch to the oven for several minutes. If the treats become very hard, crumble a small amount over regular food rather than asking the cat to bite a large piece.
Thickness controls texture more reliably than extending the bake indefinitely. Thin pieces dry faster; thicker pieces remain softer but also carry more moisture and require careful refrigeration.
How much to serve
Begin with one pea-size piece. For a small cat or a cat new to tuna, break that piece in half. Treats should never displace a regular meal, and one enthusiastic response is not a reason to offer an unlimited handful.
Because ingredient brands and treat sizes vary, calculate calories from the labels you actually use. Divide the batch total by the number of finished pieces, then fit that amount inside your cat’s daily treat allowance rather than guessing.
Storage and food-safety plan
Cool completely before placing the treats in a clean airtight container. Refrigerate for up to 3–4 days or freeze in a single layer before transferring to a freezer container for up to one month. Thaw a small portion in the refrigerator and do not refreeze repeatedly.
Discard any portion that develops an unusual smell, visible moisture, mold, or texture change. When in doubt, throw it away; home-baked treats do not contain the preservatives used in many commercial products.
Useful substitutions—and what not to substitute
- For a different protein, use the dedicated chicken or salmon recipe rather than making a one-for-one swap; moisture and binding change.
- If the dough is too dry, add water one teaspoon at a time—not oil, broth, milk, or butter.
- Do not replace oat flour with a sweetened baking mix, flavored crumbs, or self-rising flour.
Common problems and fixes
The dough is sticky
Drain the tuna more thoroughly, chill the mixture for 10 minutes, then add at most one extra tablespoon of oat flour.
The treats crumble
The tuna may be too dry or the pieces too large. Add one teaspoon of water, compress the dough firmly, and cut smaller shapes.
The cat sniffs but walks away
Offer a crumb at room temperature beside the normal meal. Do not keep changing ingredients or remove regular food to force acceptance.
When this recipe is not the right choice
Skip this recipe if your cat has a fish allergy, needs a sodium-restricted or veterinary therapeutic diet, has reacted poorly to egg or oats, or cannot safely chew the chosen texture. A veterinarian should guide treat choices for cats with chronic disease.
Frequently asked questions
Can I use tuna in oil?
Water-packed tuna is easier to portion and avoids unnecessary added fat. If oil-packed tuna is the only option, this recipe is better postponed than improvised.
Can I make the treats without egg?
Not with the same ratios. Egg provides structure. Use a separately developed egg-free recipe rather than removing it and hoping the dough will hold.
Why are the treats so small?
Small pieces make the 10% treat-calorie limit easier to respect and reduce the risk of a cat swallowing a large hard piece.
Are these a replacement for commercial cat food?
No. They lack the complete nutrient profile required for a cat’s main diet.
Can kittens eat them?
Ask the kitten’s veterinarian first. Kittens have tight nutritional requirements and little room for calories that displace complete growth food.
Safety references
These sources support the general treat, hygiene, ingredient-avoidance, and cooking-safety guidance on this page. They do not constitute veterinary approval of this individual recipe.
2 Comments on “3-Ingredient Tuna Cat Treats”